.png?h=595&iar=0&w=2781&hash=5FD5E69473BCC22199FBFA2FB71B6033)

Reef Tank Maintenance You Should Be Doing (But Probably Aren’t)
As reefkeepers, there are a bunch of small, but often overlooked, maintenance tasks that can save us a lot of time, expense, and potential heartbreak from something bad happening down the road. Some are not easy, so we may not do them as often as we should, or else we tackle them only when an emergency occurs. This is obviously not the best approach. Regular reef tank maintenance helps avoid crises with our corals, fish, and inverts, and helps prevent the expensive equipment we rely on from breaking down or failing.
I’ve found myself performing these regular small saltwater tank maintenance chores more often lately, and now I’m actually spending less time overall working on the tank and more time enjoying it. There’s also no small amount of satisfaction in getting the little jobs done on a schedule of my own choosing, rather than when an emergency forces me to drop everything to deal with them. There is an old saying that an ounce of prevention is worth a pound of cure, and that definitely applies in reefkeeping.
First, Get Organized
One thing I’ve realized recently is just how unorganized I tend to be, especially when it comes to saltwater tank maintenance equipment. I’ve lost significant time due to this. I had an uncle who was a master carpenter, and his workshop contained just about every tool you could think of. All of his tools hung on pegs or racks. But he went one step further—where each tool rested, he had drawn an outline around it on the wall, so he knew the specific spot it should be returned to when he was done with it. It also alerted him to when a tool was missing.We often rush when we are working on our tanks and just put things down on the nearest flat surface, only to be unable to find it a few seconds later. I have wasted countless hours looking for tools, test kits, vials, and more. While not a maintenance task per se, it’s definitely worth it to spend some time organizing your tank equipment and making sure everything has a place, including hoses, coral cutters, and test kits.
One of the simplest tasks I overlooked for years was brought to my attention by my young stepdaughter, who helps with water changes. We use a long hose to drain water from the tank, and detritus often clogs it. The hose was made of clear plastic, but algae and dirt had turned it black, making it impossible to find those clogs. We had to stomp along the whole length of it to find and clear out the one clogged section. She asked why I didn’t just clean the thing.
Now, once every few months, I run some diluted bleach solution through the hose and rinse it out, and it’s now perfectly clear again. Such a simple job that even a child could think of it, yet aquarists tend to overlook it.
In addition to the tank, we should spend some time maintaining the cabinetry around it, especially the metal parts. The hinges on an aquarium hood can rust quickly and become useless. While most are stainless steel, that does not mean they are rustproof. They only rust more slowly. In my experience, they will get pretty bad within two or three years, and replacing them is a pain. So, once every six months or so, I coat them in petroleum jelly, which provides strong protection.
Keeping track of tasks that need to be done a couple of times a year is difficult, especially as we get busier. Create a log with saltwater tank maintenance reminders, such as “replace UV bulb.” There are apps for your phone that can help. Every six months, mine reminds me to “oil fish tank hinges.” Of course, you can simply use a paper list if you’re not as technically inclined.
A log book should also keep track of the tank’s parameters and everything else that is done or added to a tank. Being able to check what happened and when makes it easier to determine what these changes might have caused. For example, if you change to a different brand of salt, bump up the alkalinity or temperature, or change your lighting schedule, you may not notice any effects right away. With a log, the positive or negative effects of these changes can be seen over time.
The same is true when new fish or corals are added to a tank. I also use a log to keep track of how long a given piece of equipment usually lasts, and then I use this information to set reminders for when it needs to be replaced.
My various maintenance tasks are now done on a more regular basis, and this has helped keep the tank more stable. For example, the three-part additives that supplement alkalinity, calcium, and magnesium are all used up at different rates on my tank. Once the rates of use were determined, I set up reminders on my phone so that new batches are mixed and ready to replace the old solutions before they run out. This keeps the levels of these compounds stable, which in turn helps to keep the tank stable.
Let’s take a look at some of the saltwater tank maintenance tasks that often go neglected.
Protein Skimmer Upkeep
The part of the skimmer that needs the most maintenance is its neck. As scum forms on the neck, it becomes slicker, and so the foam that is created has an increasingly more difficult time getting over the neck to fall into the scum cup. The best way to keep this from happening is to clean the neck regularly. I do it once a day with a paper towel. This takes a couple of seconds, and not only has it greatly improved my skimmer’s efficiency, but it also means I don’t have to remove them and clean them when they’re all gunked up.
This improved efficiency is only maintained if the air flow into the skimmer is kept at the optimal level. Over time, the air intake of most skimmers becomes clogged from salt crust forming where the air is drawn in. Fortunately, keeping these openings salt-free and wide open is easy. Simply allow the intake hoses to draw in water rather than air. On my tanks, the venturi intake hoses are removed from the pumps and allowed to draw in water from the tank once a month. This dissolves the salt buildup.
Similarly, the skimmer pumps, especially if they are the needle-wheel type, tend to accumulate detritus in their spikes over time. So, once every three months, the pumps are taken offline, and the impellers are removed and cleaned. By doing these tasks regularly, the skimmer is not only maintained at peak efficiency, but this regular maintenance also helps prolong the health of the pumps.
Lastly, the foam/scum has a tendency to escape the cup, which produces a mess. To reduce this, I was taught the trick of coating the outer cup of the skimmer, along with the top and the outside neck away from the foam, with vegetable oil. This prevents the scum from sticking to it, which not only keeps it from escaping the cup but also makes cleaning the cup much easier.
Lighting Maintenance
Most of us run LED lighting these days. We take it for granted that these newer lights don’t need the type of maintenance that old-style halide lights did. Unfortunately, this is not true. Especially due to the close proximity to our tanks, they do need regular care.Most LED lamps have fans that help to keep the units cool. Many fans fail long before the LEDs themselves, but once the fans go, the lights become useless soon after, because they need to be cooled. And to make things worse, the fans often are not replaceable.
About once a month, the fans should be blown out with a can of compressed air. The light itself should also be wiped down of any salt creep and dust at this time. Once a quarter or so, the lights should be disassembled and cleaned thoroughly with cotton swabs and isopropyl alcohol (taking special care around the electronics). This will help to keep the lights running at peak efficiency and ensure that they last their entire expected lifetime.
Keeping the Plumbing Clear
The pipes and tubing that make up the plumbing are also often neglected. It’s not only water flowing through them, but also food, waste, and detritus. As a result, many organisms find pipes and hoses to be a great place to set up residence. Over time, they can populate to such an extent that the flow slows or even stops. The worst case of this I ever saw happened in a friend’s tank, which was overflowing by the time he frantically called for my help.The overflow pipe was completely clogged. He had assembled the piping without any unions, so we had to saw into it to find out what was causing the clog, and I’ll never forget what we discovered. It was stopped up with bristleworms. Big, fat, writhing bristleworms, and it smelled disgusting. Plumbing should always be assembled with unions and made easy to disassemble so it can be cleaned once or twice year. Detritus and the animals that will take up residence inside the pumps can be washed away with a good spray of freshwater.
Similarly, overflows and overflow boxes become havens for detritus and sedentary organisms like tubeworms or vermetid snails. Unfortunately, these are not always easy to access and as a result they are not cleaned out. I have found it beneficial to make sure that they are cleaned and that all detritus is siphoned from them at least once a quarter. I make it part of my monthly cleaning routine and have found reduced nitrate and phosphate levels in my tanks as a result, lessening the need for resins or other means of removing these nutrients.
Pump Maintenance
When your pipes and overflow are offline, it is a great time to do maintenance on the return pumps. Over time, pumps can draw in detritus, small particles, and other material that can slow their function, so they should be regularly disassembled and cleaned. I use a garden hose to power wash mine, as some of the material that accumulates in them is difficult to remove any other way.In the worst case, where calcium-based residue has become lodged in the pumps, it may be necessary to soak them in warmed white vinegar or citric acid to dissolve the deposits. Afterward the pumps should be thoroughly rinsed in freshwater before being put back into service.
Don’t neglect the pumps or powerheads within the tank, either. Like their external counterparts, they need regular maintenance for their long-term health and efficiency. In my systems, these pumps are taken offline once a quarter, disassembled, scrubbed with a nylon bristle brush, and, if needed, soaked in citric acid or vinegar. Depending on your own setup, you may find it more helpful to do this monthly. I found that they didn’t reduce much inflow if I did this task a little less frequently.
One of the positive effects of maintaining pumps and gaining increased flow is that it helps to keep detritus in the water column, where it can be removed by filtration. However, no matter how much flow there is, spots that form detritus pockets will likely still remain. These tend to form around small coral frags more than they do around larger, grown-in corals. This can produce outbreaks of cyanobacteria, dinoflagellates, and vermetid snails, and ultimately cause tissue necrosis.
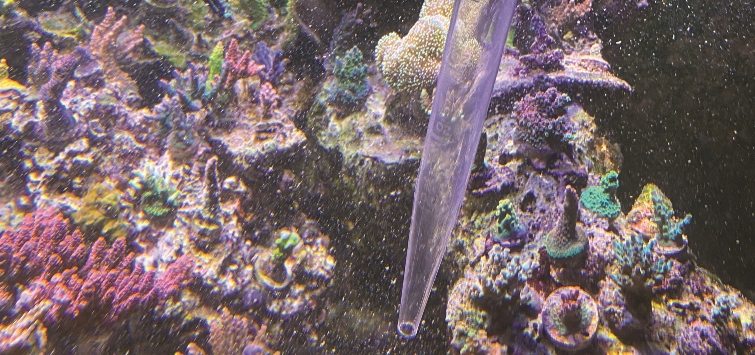
For this reason, I blast coral frags every day or two with extra flow. A small powerhead or pump can be used, but I find a turkey baster to be pretty effective. It’s an incredibly important task for the health of your coral frags.
Reef filtration setups usually have some method for catching and removing detritus, be it floss, filter socks, or other media. Cleaning these every few days, especially after blowing out detritus pockets, is beneficial to the tank.
Mixing-Vat Upkeep
Finally, a chore so many of us overlook is the maintenance of our water-mixing vat or tub. Sludge accumulates in the bottom of these and may build up over the sides. I see so many aquarists who are obsessive about the quality of the water that goes into the mixing vat but take no time to consider the amount of crud being added to it by their vat.While I have not seen any deleterious effect from having this material get into the tank, it eliminates another concern after this chamber is cleaned. The sludge can be dissolved with vinegar or citric acid and hot water. Just make sure to thoroughly rinse out the chamber once a new saltwater mix is started.
An Ounce of Prevention
Time management becomes easier if you determine how long each maintenance task takes and keep track of it. Then, you can set aside that time in your schedule. By knowing which tasks you plan to do, and setting aside time to do them, you are more likely not to put them off and inadvertently cause bigger, much more time-consuming problems down the road.
I’d like to add one last maintenance task to your list, one that is fun to do and should be done daily: sitting down and taking the time to just relax and watch your tank. Don’t make it part of anything else you do, such as feeding or testing. If you keep it separate, the fish will not anticipate you performing any activity and will behave naturally.
By simply watching, you can see if a fish is being picked on, hides constantly, or just does not look right, if a fish has acquired a taste for any corals, and generally how everyone is getting along when they are not being fed or disturbed. With how busy everyone is, it is often difficult to take the time to just sit back and enjoy your reef tank. But that may be the most important maintenance task of all.
See the full article on TFH Digital
https://www.tfhdigital.com/tfh/jul_aug_2021/MobilePagedReplica.action?pm=2&folio=22#pg25