.png?h=595&iar=0&w=2781&hash=5FD5E69473BCC22199FBFA2FB71B6033)
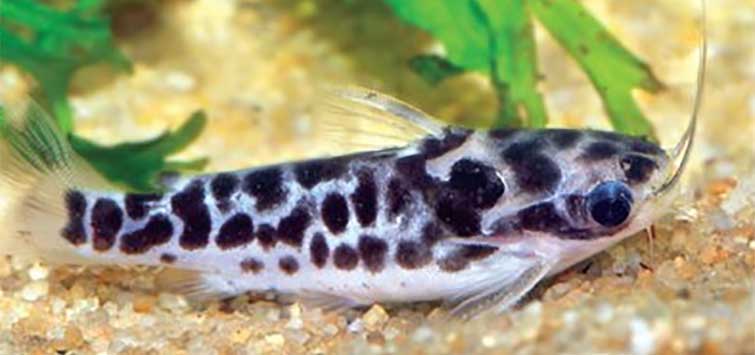
Catfish Corner: Needed Changes
Author: Lee Finley
Filters perform numerous necessary and valuable tasks. But in the world of the closed system aquarium, more is needed. While the old concept of the “balanced aquarium” may be philosophically appealing, it is not one that works on its own. Partial “balance,” or at least help towards it, may be achieved, but in the end the aquarist must manually intervene to help things along toward the goal of maintaining a healthy and successful aquarium. This intervention has a name, and that name is “water change.”
Why Water Changes Are Important
Although the processes of biological and mechanical filtration do wonders in maintaining partial stability in a tank, the end result of this process, nitrate, builds up and can have an ongoing depressing effect on the system and its inhabitants. Most fishes within a system can grow accustomed to this buildup (albeit unhappily), but new additions will often fail to thrive—or worse. So it is the aquarist’s job to make sure that nitrate levels are controlled within the tank.
Tanks that are well adorned with live plants are a bit better off than those without, in that growing plants will utilize nitrates as a part of their nutritional process. In a heavily planted tank containing a small fish population, the move towards “balance” (at least as it relates to nitrates) may often be quite successful. But the general trend of the hobby is towards larger populations of fishes, so plants (if used) are only a partial answer. Hey, I like to have some live plants in my tanks, but the main thrust of my hobby is to have more catfishes.
The above only makes note of end products of the nitrogen cycle. There are other biological products, such as various pheromones released by fishes that, while natural, will have a depressing effect in a closed system on particular species or the group of fishes as a whole. These and other products, known and unknown, must be removed from the aquarium environment to promote vitality and good health.
How to Schedule Water Maintenance
There are whole books written on the above briefly mentioned topics, so I don’t want to go on and on. Just suffice it to say that you need to develop a regular program of partial water changes for your aquarium in general—and your catfishes in particular.
The general concept of water changing is simple. You remove a certain volume of the water from the tank, discard it, and then replace it with an equal amount of fresh water. A regular schedule for doing this should be set up and adhered to. You can have some latitude with this (a day or two each way won’t really matter), but a regularity of such changes should be maintained. I will emphasize here that this is real changing of water, not just adding fresh water to make up for loss by evaporation. When water evaporates, the substances that you want to remove stay behind; just adding water will only lead toward the concentration of them, which will only make matters worse.
Determining How Much Water to Change
How much water you change in a given tank can depend on a number of factors: the amount and sizes of the fishes in the tank and/or the dietary habits of the particular fishes being kept are a couple that come immediately to mind. A heavily populated tank will obviously require more, and larger, regular water changes. This goes for just about any kind of catfish—and other fishes for that matter. A tank with only a few larger fish that will be eating more food and consequently producing more wastes will also need a similar plan for water changes.
As a starting place for any general catfish (or other) aquarium, I would suggest a water change in the range of 15 to 20 percent be done at least every two weeks. Many aquarists—and I am of this school—prefer to do such percentage changes on a weekly basis. Sure, life must go on and you may on occasion fall behind a bit, but if you set the goal and stay close to it, your fishes are definitely going to be better for it. For those larger fishes, and those with a more meaty (more protein-based) diet, you might consider following the same schedule but increasing the percent of water changed to the 20- to 40-percent range.
Water Changing Equipment
Now to the physical part of the concept. There are water-changing devices on the market, which you are more than welcome to use, but I will admit that I am a bucket and hose kind of guy. All you need for this is a dedicated “fish bucket” with a good handle and a wide-mouth siphon hose. The latter is available in a number of forms from your local aquarium store. Often you can get a good bucket from the same source (it most likely would have contained bulk food or marine salt). Lacking this, you can either pick one up at a big box store or look around for an empty joint compound bucket, which can be washed out thoroughly and then be drafted for water-changing duty. There are also other more enjoyable options.
Years ago, my wife Aline worked for a lawyer and one day had to deliver some papers to a client who just happened to own a well-known donut store. Aline knew that I was always looking for 5-gallon buckets with tops, so when she saw a number of “empty” ones sitting around she asked the owner what he did with them. “Basically they go in the dumpster,” was his answer. So, Aline asked if she could have a few. “Sure,” was the answer (anything to keep your lawyer’s secretary happy). When Aline got home from work she had a nice little surprise for me—but it was even better than you might think. The buckets were used for various donut fillings and were still mildly rich (for two people at least) with product. It was hard work, but to get the buckets ready for the fishroom we actually had to get a couple of spoons and gorge ourselves on Bavarian cream filling. It doesn’t get much better than that. We saved the apple filling for the next day.
To prepare for the water change you will want to do a few things: unplug and remove the cover or hood that is on the tank; if you have an outside-hanging power filter turn it off so that you don’t by chance run it dry; and unplug any heating devices—you definitely don’t want to take the chance of having air hit the working part (heat generating) of one of these.
How to Change the Water
Step 1: Drain the Water
So, you are ready to do your water change. Put the bucket in front of and below the level of the tank, and the wide mouth part of the siphon hose into the tank. Start the siphon by sucking on the hose, then quickly holding, or placing, the end of the hose into the bucket. The theory and practice of a siphon then does the rest for you and drains water into the bucket.
Here I should pause and tell you of something to keep in the back of your mind. This is one of the major laws of aquarium keeping, which is that water weighs approximately 8½ pounds per gallon. Do consider this, because you are going to have to discard the “fruits” of your siphoning. And remember, you don’t have to totally fill the bucket. Drain off only as much water at a time as you, or another family member, can easily carry. In any case you don’t want to totally fill the bucket anyway because of another aquarium law, the rule of splashing, which is one best not broken—it upsets people!
Step 2: Vacuum the Gravel
I have mentioned the wide-mouth siphon a couple of times, and maybe it is best that I say a few words on this. The function of this wide intake is to allow you to clean the gravel in the tank. You can first pass the intake over the gravel to pull off any material laying on the surface. Then you simply press the end into the gravel and the water being pulled in will tumble the gravel a bit (but not suck it up) and particulate material (bits of food, feces, etc.) that is therein, and lighter in weight, will be siphoned away into your bucket. You don’t have to try to “vacuum” all of the gravel during one water change; skip around, take some now, get some more the next time. Just do it regularly with each change.
Step 3: Dispose of the Water
Once the water level in your bucket has reached a point that you want, you can break the siphon by lifting the intake part out of the water. Do this holding it over the tank, though, as there will usually be a bit of backflow. Now to dispose of the water at the nearest and easiest place. But do consider the axiom “waste not, want not”; the very things that make this water less than ideal for your fishes makes it wonderful for your plants. Houseplants will thrive on this water that you might otherwise just throw away. And if you are up to carrying it further (or have someone to do it—my wife has me) this water is equally relished by outdoor plants. As I said, waste not, want not. Water is getting more precious than you might think.
Step 4: Replace the Water
Now that you have removed the needed amount of water, it is time to replace it. You can run water from your tap back into your (rinsed out) bucket, making sure that it is the same temperature as the tank water. You can then add (if needed) any appropriate water conditioner to remove chlorine and/or chloramine.
Step 5: Aerate
Although it is not always needed, I would suggest using a small air pump and an airstone to aerate the water for about 15 minutes before adding it to the tank. Many times, especially in the winter when water is colder, there is air under pressure in the water (ever wonder where those bubbles sometime come from when you let a glass of cold water sit for awhile?) and it is good to bubble this out before adding the water to the tank. While this is going on, you can take care of any needed filter maintenance or media replacement.
Step 6: Fill the Aquarium
You can use a smaller (one-gallon) bucket, or other appropriate container, for putting the water back into the aquarium. Like your “fish bucket,” make this a dedicated piece of equipment and only wash, or rinse, it in warm water (no cleaners). You can use a bit of salt if you wish, but make sure that this is rinsed out.
Finishing Up
When the new water is in the tank you can restart your filter and heater and make sure that both are working properly. Then put the hood back in place and you are all set…for a while. The whole process will go rather quickly and is one of the best investments that you can make toward aquatic success.
The whole process is not really as complicated as it might seem. The regular changing of water is not very time consuming and will pay you back many times over. Your fishes will be healthier and happier. Their appetites will be up and their colors more glowing. It can also do wonders to stimulate their reproductive urges.
Water changes are a win/win situation, and they will help to cement in your enjoyment of the hobby.