.png?h=595&iar=0&w=2781&hash=5FD5E69473BCC22199FBFA2FB71B6033)
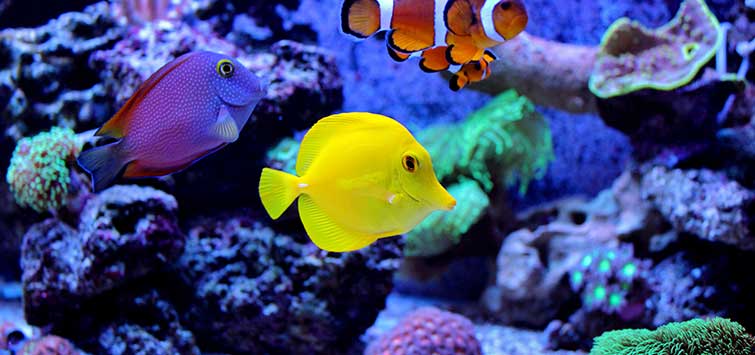
Tips & Tricks for a Beginner Saltwater Aquarium
As a wise man once said, seeing one person fall down means you know where not to step. With that in mind, I decided to put together a collection of things I wish I’d known before setting up my first beginner saltwater aquarium.
This article features some pointers for those who are new to marine fishkeeping. Though it focuses on the saltwater segment of the hobby, almost all of it applies to aquariums in general. And though some of the information may seem obvious, as in most fields of endeavor, the basics are the foundation upon which complexity is built, so it’s a good idea to start there.
Saltwater Tank Setup
When first setting up a marine aquarium, try not to dive into the immense amount of information out there all at once, as exciting as this new endeavor may be. Sometimes looking at too many “recipes” from various sources gives you more ideas about how to use a plethora of “ingredients,” but it can also lead to an unpalatable and unattractive stew.
Eventually, you can fill up on as much info as possible, but not as your first step. Instead, pick one system that works and copy it. Stick to it religiously. Learn the reasons behind the choices and go from there.
The following are some good basic tips for your initial saltwater tank setup:
• Additives and supplements are generally unnecessary for novices’ tanks. Partial water changes will do the job until you learn the basics. Once you are testing for specific readings for known, particular purposes, you can begin to add supplements to reach your particular goals.
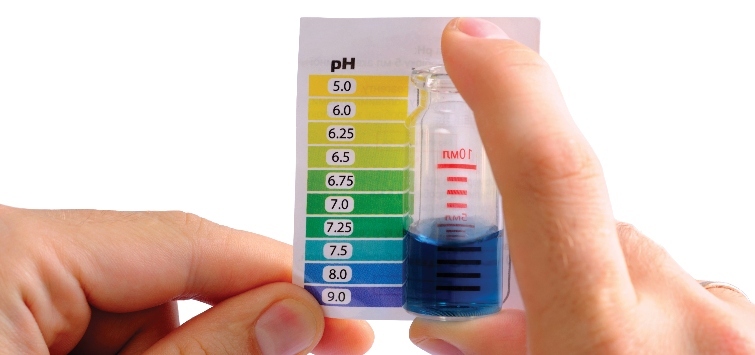
• Only a few basic water tests are truly necessary for a starting aquarist. The most important are for aquarium salinity and temperature, but you should also test for nitrates, nitrites, ammonia, and pH. With more experience, you may want to extend this to other tests once you know specifically what to test for and why. Reef aquariums with coral will require more tests than fish-only tanks. Spring for good reagent-based kits. They’re well worth the investment and, believe me, they pay for themselves. Test kits are an example of where to spend a little extra for large returns.
• There are some things you should spend money on. A good refractometer, which measures salinity and is much more accurate and more durable than a hydrometer, is one of them. While it is an initial expense, it’s cheaper than replacing a procession of cheap hydrometers, and certainly cheaper than losing livestock because of incorrect measurements.
• Bigger is better. More gallons means more stability of temperature and other parameters, plus more room for activity and more territory for animals. It also means more space for live rock and substrate, and thus more area for helpful bacteria to grow. A larger skimmer is more powerful, which means cleaner water. Larger aquarium pumps mean more water turnover and oxygenation. Consider whether a piece of gear is going to be the final one for the tank or if you’re going to want—or need—to upgrade to another model in just a few months. Paying a bit more for equipment at the beginning is a lot cheaper than paying again if you upgrade.
• Getting the most out of your lights is all about timers, timers, timers! Since consistency is king, once you decide on your day/night period, it’s reassuring to know that every day, whether you’re home or away, the lights will come on at the right time and turn off again later. Personally, I like the lights to be on during the times I am most likely to be around to enjoy the aquarium. The needs of your specific inhabitants will decide the length of your photoperiod, but 10 hours per day is what I go for. Various corals will need different considerations, but the key is not to have to be around to remember to manually switch the lights on and off daily. Many newer lights even have built-in timers that can slowly adjust the lights, creating a less jarring and neat-to-watch “sun-up/sun-down” period. You may reach the point where you’ll want to invest in a similar controller for your lights.
• Always remember, safety first! If you ignore this, it is only a matter of when, not if, something unexpected will go awry and possibly lead to shocks, fires, or worse. You can simply use a simple ground fault circuit interrupter (GFCI). You know those wall sockets in your kitchen and bathroom with the breakers? The ones there to prevent deadly accidents if a toaster or hair dryer falls into the sink or tub? Use those for your aquarium as well. If there is only one bit of advice you heed, let this be it! You can find power strips with breakers in the outdoor lighting supplies section at your local hardware store, or they can also be cheaply installed in your wall outlets if you are handy enough to safely perform some simple electrical modifications.
• While considering electrical connections, also make sure all your cords have drip loops. Above all, do not leave tap strips (“surge protectors”) on the bottom of your stand or anywhere water can get into them. They have mounting holes on the back for a reason. Hang them up where they’ll stay dry. Saltwater and electricity do not mix, and I have seen many tap strips with burnt outlets from small drips. Make sure to regularly (i.e., weekly) clean up any salt creep inside your stand, especially on or near electrical cords.
• Plumbing skills and PVC are your best friends. You will want to learn some simple plumbing skills. This is the number one area that I personally had no knowledge of or expectation I’d need, which limited me immeasurably and made me kick myself later. Some basic skills are very easy to obtain with online video tutorials, and they have no limit as far as usefulness. PVC is incredibly low-cost, and buying some extra pieces to practice on helps. I wish I had set up my first few systems with more forward-thinking plumbing plans, rather than figuring things out after I had beautiful corals growing on rocks that I needed to tear down to install a higher-volume overflow or second return line.
• In my opinion, protein skimmers are mandatory. There is absolutely no reason not to use at least a basic model, and any skimmer is better than none. There are many options that vary in price and complexity (to the point of being intimidating), but in accordance with our keep-it-simple approach in this article, stick with durable, simple, and reliable. I do, however, find that sound bafflers are a must.
Live Rock and Sand
• Don’t just stack your rocks in a pile. They will eventually be undermined by shifting sand, creatures, and your hands and come tumbling down. Don’t rest rock of any size on your substrate. Carefully place rock on the bottom of the tank itself to make a solid foundation and build up your aquascape from that. Fit the rock together like a jigsaw puzzle as much as possible. Use plastic zip ties or even a PVC or acrylic rod framework. Make this its own fun project! A well-planned design is an endless joy, and a slapdash one is an eyesore and a problem. Look at others’ systems, public aquariums, and even natural reefs for ideas.
• Some live rock will seed your sand with helpful bacteria and organisms. Fine-grained aragonite sand is especially helpful, however, and prepackaged live sand is a great source if you’re unable to find it yourself dry and in bulk.
• Don’t worry about purple coloration from coralline algae, because those attractive colors will come naturally and are an indicator of health. The new water from your partial water changes will add what it needs to grow. You just need to help it along via some rock that already has some, and it will spread from there.
• Good rock and sand negate the need for live fishes as a tool for cycling a new tank. Just don’t do it. Live rock can cycle your saltwater tank setup just fine, it is less cruel and more effective, and you’re already putting the rock in there anyway. Alternatively, throw a raw cocktail shrimp or two in there to get a quick and efficient cycle going.
Crucial Backup Plans
Always have a backup plan for any foreseeable problems with your beginner saltwater aquarium. Consider power outages, storms, disease outbreaks, and equipment failures. A well-planned setup will minimize future problems. Here are some ideas:• Have a backup heater for your system and keep spare parts on hand for your critical pumps and filters. Needing a new impeller for your return pump that will take several days to be shipped to you can result in significant loss of aquarium life (or at least require expensive overnight shipping). Also get a good battery-powered aerator in case you’re without power for several days—and test it from time to time!
• Set up an additional quarantine tank. This is the one area I wish more people had told me about in advance. Nothing is worse than trying to catch an ich-covered fish in a reef tank filled with intricate rockwork and beautiful corals, except maybe realizing that the ich has spread to your favorite tang that’s been in the tank for three years. Quarantine, quarantine, quarantine!
• Have a penalty box for troublesome fish. A time-out isolation box for troublemakers or victims under siege is your savior. This is a good thing to have handy in case it’s 10 p.m. and you notice a pufferfish has been biting your crabs. You can put him in the penalty box like a hockey player and deal with the situation in the morning! The box can be any stationary food-safe container that fits into your tank or sump so that the creature can be contained. Make sure it is ventilated and not removed from current and oxygenation, though. A plastic pasta strainer (basically a deep bowl with holes that floats) is good to have around.
Diving Deeper
Good places for help with your new hobby are aquarium clubs, any aquarium vets you can talk to, trusted shops, books, magazines (like this one!), and even public aquariums. As you look around, you’ll spot aspects of your setup that can be improved. This is a great way to determine where you want to invest more money over time.With some foresight, a well-thought-out plan, and pointers gleaned from the accumulated experience of others, you can “get your feet wet” with little trouble.
Hopefully this rundown of some of my own experiences (and those of many friends) will provide immediately useful, hands-on ideas and information that will help you avoid a lot of problems. Heading off potential complications (let alone full-blown disasters) will allow you to get much more enjoyment from your beginner saltwater aquarium. As you gain experience, you’ll eventually have some practical tips of your own to share as well. Fish on!
See the full article on TFH Digital
https://www.tfhdigital.com/tfh/jan_feb_2019/MobilePagedReplica.action?pm=2&folio=74#pg77