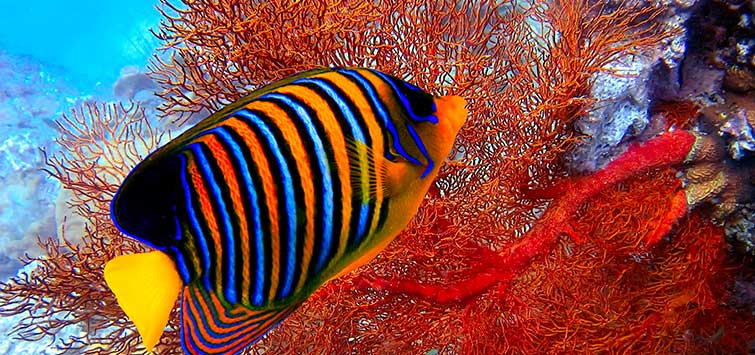
.png?h=595&iar=0&w=2781&hash=5FD5E69473BCC22199FBFA2FB71B6033)
How to Start and Maintain a Nano Reef
Author: Nicholas Violand
TFH's inquiring editorial intern equips, sets up, and stocks a nano reef tank, gaining valuable insight into the current nano craze and learning a few key lessons along the way.
Join the Nano Movement!
If you’ve been successful with creating and maintaining a nano reef, you ought to be commended. And if you’ve contemplated a nano and still haven’t been completely scared off by naysayers, allow me to throw in my two cents. You may find there are many things you haven’t thought of yet. These micro-marvels of the marine hobby, which attained a cult following but are becoming more mainstream, bring to the table a whole new array of considerations because of their size. Although the term is conventionally used to refer to smaller than 40 gallons, “nano” here refers to systems smaller than 15.
And You Are…?
As a student of the sciences at Rutgers University, I became particularly interested in marine biology and fishkeeping, and I also served as an editorial intern for TFH this past summer (which was an awesome experience by the way, if any of you college-age readers out there are interested for next year!). After my first saltwater tank a few years ago, I was disappointed that I couldn’t afford sufficient lighting and filtration to create a full reef.
One thing about many of the nano naysayers is that very few have ever even tried to keep a nano. Most insist they’re too difficult to attempt and only recommend tanks at least 40 to 55 gallons. Well, I’ve defied convention, joined the revolution, and started my own nano reef. And I didn’t fail in keeping things afloat—at least not completely.
All or Nothing
Some of the perceived benefits and pitfalls of nano reefs are easily outlined. Beginners often think a small reef is possible at a small price, and if the tank is small, it must be low maintenance, right? If you’re new to nanos, you may believe these myths.
If you’re a pessimist, you’re thinking the water parameters are impossible to keep track of, and any fluctuations are uncontrollable. Well, both parties are right—and wrong. Follow me on the arduous journey I took to build and maintain my own nano, and you’ll see both sides of the battle.
Plenty of Choices
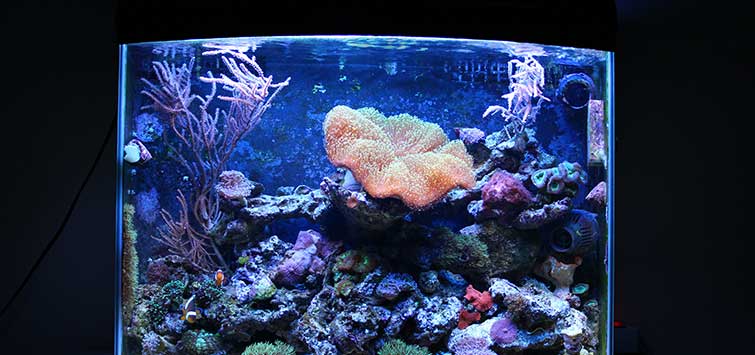
In choosing a nano reef, I would have the ability to house corals that I was previously unable to keep in my insufficient FOWLR tank. The desire to house zooxanthellae-dependent organisms was very strong for me, so I loved the idea of affordable all-in-one setups (herein referred to as AIOs) with strong lighting and efficient filtration systems built in.
After discovering the bustling online forums devoted to nanos, I had many of my initial questions answered, and a window for future guidance. I recommend any interested hobbyist begin by digging through such forum threads, and some good books, like the Nano Reef Handbook by C. R. Brightwell (T.F.H. Publications, 2006). With some research, I selected an AIO, which arrived at my doorstep quickly, along with a few accessories.
Picking and Choosing
You have a few choices with nano setups, one being the tried-and-true standard seamed glass tank with external filtration, skimming, and lighting, or even a separate refugium. You can either build a system from individual parts or choose one of the many AIOs on the market. The various manufacturers of these seem to be in competition to see who can most effectively pack in the most features, so there are some good choices out there.
The model I chose has two 24-watt compact fluorescent actinic and daylight lamps over 9 gallons (over 5 watts per gallon, more than minimal for corals), and separate filter chambers built into the tank. The deciding factors in making my choice were the cleverly cornered protein skimmer and refugium basket with a built-in light for macroalgae. However, I’ve yet to see a small AIO that perfectly integrates every necessity of a successful nano reef.
That’s a Real Little Skimmer
Many add-ons can be incorporated into a mini-reef, but are considered overkill for nanos. While this applies to add-ons like wavemakers, there are components designed in nano sizes that you don’t want to be without—the best example being the various tiny protein skimmers now flooding the market.
Having biological, chemical, and/or mechanical filtration is also a must, especially for the biological/natural kind, which works wonders in a small setup. I utilized macroalgae in the sparsely lit refugium (illuminated at night to prevent pH swings) for nitrate removal, along with some live rock and sand. In a small volume, you must use as many methods as possible to remove undesired elements, so plan for biological, chemical, and mechanical filtration if possible. An external filter for a slightly larger setup is not a bad idea either—just don’t create excessive water movement.
Among many nano components, price doesn’t necessarily correspond with size, and as with most things, you get what you pay for. A quality nano component won’t be cheap, so don’t think nano size should translate to nano price. Skimmers, filters, and lights can be had rather affordably, but their abilities will be limited in comparison to the more costly ones of similar size.
Cleaning any fish tank requires time and patience! If you need help, contact an aquarium cleaning service for assistance.
Sure, Go Overboard, Just Don’t Drown
Of course there are must-haves for your nano reef: heaters, thermometers, GFI powerstrips, and test kits; and you can debatably go without a protein skimmer (something I wouldn’t try on a well-stocked system). But if you don’t mind spending the extra cash, you can throw in things like powerheads, chillers, auto top-offs, monitors, wavemakers, and the like. Add whatever you feel is necessary, just don’t overcrowd your system (and try not to constantly trip your circuit breaker, either). At first, you can save a lot of money by leaving things out, but you’ll find yourself slowly spending what you saved.
You can purchase reverse-osmosis (RO) water from your LFS or another source, but the costs eventually add up, and you’ll be wishing you made the investment in an RO unit, no matter how small your setup. The most convenient (not least expensive) solution for me was an RO system for daily top-up water, and pre-mixed saltwater from my LFS for 2½-gallon weekly water changes, merely a time saver.
Setting Up
So you’ve got your nano tank and components, you’ll now need to consider placement. Once filled, you must consider the location of the tank to be permanent—you wouldn’t want to disturb your micro-environment once it’s settled. Also, no matter the size, moving even a partially filled tank runs the risk of stressing the seams, leading to a potential flood, albeit a minute one.
Step 1
Place your reef in a place with significant traffic, where it can be observed often, but not disturbed by too-frequent fluctuations in ambient temperature. Heat can become a big problem for your nano, so pick a place that won’t get too hot. My parents inadvertently got the right idea when they made me house my first salt tank in the basement (so as not to ruin my mother’s floors). It wasn’t exposed to the heat of the first floor, so it was safe from fluctuations. Temperatures within a small tank can rise or plummet with the ambient temperature, so a cool basement is not a bad idea, just use a good heater as well, and check the tank daily.
Step 2
A leak test is in order next. For even the smallest leak you’d have to remove all of the sealant, and completely redo it. With a new aquarium, return it to the dealer for a replacement if you detect any problems.
Step 3
Once you know your tank holds water, place the components in their respective locations. Don’t become a gadget-a-holic, as I did. Running too many pumps shouldn’t add a lot of heat, but you may accidentally draw too much water from your filter chamber (in the case of an AIO). I implemented a powerhead and a UV sterilizer in my 9-gallon nano, but not without placement considerations.
A good rule of thumb is one pound of live rock per gallon, with live-sand substrate a half-inch thick. Clean up your live rock first (I prefer a quick freshwater dip), then aquascape against the bottom of the dry aquarium.
Step 4
Pour in water and live sand, enough to hold the aquascaping in place, then cover the entire area with a clean plastic bag, the one the live rock came in, for instance. That way, when you pour in pre-mixed, temperature- and pH-adjusted saltwater, you won’t move the micro-rockwork. Remember, it’s not called live rock for nothing; keep it moist this entire time and fill the tank as quickly as possible, so you don’t get too much die-off, which would throw off your water chemistry.
Do I Really Need To Wait?
While debate wages over whether to seed tanks with sand and rock from established setups, both sides present reasonable arguments, applicable to mini and nano reefs. Using old live rock and sand, you’re seeding your new nano with microfauna you’ll otherwise be waiting to establish. Since it’s small, incorporating them should be a quick process; however, be careful not to take too much sand or rock from a pre-existing system. I’ve been advised this can cause instability in the system from which it’s removed, both chemically and structurally. A happy medium for me was taking a small quantity of rock and sand from my two-year-old FOWLR, just not enough to effect any drastic changes. Season your new filter by placing media in an established setup, then moving it to your new one after a while.
No pre-existing setup? It’s imperative you grasp the concepts behind the nitrogen cycle. Don’t jump the gun, stocking too early, before your ammonia, nitrite, and nitrate levels have had a chance to stabilize and approach zero.
The Order of Your Additions
In a reef tank, inverts come first. Choose other livestock that are compatible with your inverts, and will not eat, kill, or otherwise annoy them. It’s best, of course, to wait until the tank is fully cycled, and your water conditions have stabilized. I did two huge water changes before I added any volatile organisms. If you see algae blooms building up, add a cleaning crew to test things out and neaten up.
Depending on the size of the tank, it may be best to completely leave fish out, but you’ll find more invert doors have opened for you. If any inverts you desire can sting others, put these in first so they settle in and stay in one place. Some inverts are much more sensitive than others, and are much easier to lose if the tank becomes unstable. If you prefer such organisms, wait until you have a strong handle on your water parameters. “How easy is that to kill?” has become my favorite question at my LFS.
Variety is the Spice of Life, Not Your Nano
Full-size mini reefs definitely have nanos beat with respect to the variety of organisms you can house only in larger capacities. Some of us may look longingly at the exotic specimens at our LFS, but most of them are clearly designated for larger setups. Even the seemingly small juveniles, which grow rapidly, will struggle in tiny quarters.
Unfortunately, fish like anthias, butterflyfish, and surgeonfish get too large, and others like lionfishes, angels, and eels are out of the question, as they are not reef safe.
Many invertebrates are not reef safe either, nor will they be able to survive in a nano. Some shrimps and crabs fall into this category, and lobsters require heavy feeding, which can destroy a small system. Of course, anemones are not recommended for nanos, and most LPS corals are more difficult to place and sustain than their SPS cousins. Much to my dismay, though small tridacnid clams could be kept in nanos with pristine water conditions, they grow far too large to be kept long term.
Compatible Fish Species for Your Nano
While many creatures are strongly advised against, certain ones can thrive. Among these are fairy wrasses like Cirrhilabrus lubbocki and C. rubripinnis; grammas Gramma loreto and G. melacara (less territorial than dottybacks); cardinals Pterapogon kauderni and Sphaeramia nematoptera; Amblyeleotris randalli, A. guttata, and A. wheeleri gobies; Nemateleotris magnifica and N. decora dartfishes; and some damselfishes (which tend to be aggressive) housed individually like Chrysiptera cyanea, C. parasema, and Dascyllus aruanus.
Anemonefishes like Amphiprion ocellaris and A. percula can do surprisingly well, as they typically inhabit only a small space in the wild, so they can contently conform to small spaces in captivity. Pygmy angels may be considered, but their reef-safe status and maximum length should be researched first. And please do not keep mandarinfishes like Synchiropus picturatus, unless you’ve got an established refugium from which to offer a constant supply of tiny invertebrates for them to eat.
Invert Species Suitable to a Nano
The crowning achievement of my nano project was my first coral, which I admittedly purchased on impulse. With the rest, I did a little reading to find out what could adapt best to my small tank. Zoanthids were given high praise, as they’re among the hardier soft corals, coming in many different varieties. Nepthea, Xenia, and Cladiella may also do well, but should only be placed in nanos that are stable and well established. You’ll find it rather easy and affordable to obtain tiny frags from fellow hobbyists or groups like GARF, the Geothermal Aquaculture Research Foundation, rather than purchasing fully grown colonies for more money.
Peppermints were among the shrimps that remain at a manageable size and won’t cause havoc. Small hermits and a snail are definite requirements as well, but don’t use so many that there won’t be enough algae for them all to eat.
Important Habits
Checkups
As with any reef setup, certain things must be done on a regular basis. Spend time every day checking to be certain all inhabitants are alive and well, feeding them sparingly. Remember that some invertebrates should be fed less frequently than most fishes, which will help to keep the dissolved nutrient levels down, keeping microalgae and cyanobacteria in check.
Water Testing
Invest in a decent test kit, so you can at least monitor ammonia, nitrates, nitrites, and pH. Calcium and phosphate tests are highly recommended as well, and, as always, check your specific gravity/salinity and temperature regularly. Most tests can be done weekly, but salinity and temperature should be checked daily, especially because specific gravity fluctuations caused by salt creep and water evaporation can rapidly affect your nano. This is where a costly but more accurate refractometer will make life easier.
Cleaning and Regular Maintenance
New formulations of nano supplements are on the market, the one I used had directions for drop-wise additions on a daily basis. This is really the best way to prevent overdosing the system. You can also calculate how much water typically evaporates from your system on a daily basis, and from this, determine the quantity of supplements you can dose through your top-up water, added either manually every day, or by the use of an auto top-off.
Be sure to check your components to make sure they are functioning properly, clean your skimmer cup and the aquarium glass, and do water changes either weekly or bi-weekly. If you prefer to do them bi-weekly, do them in a larger volume percentage. It’s often best to do smaller ones on a weekly basis.
Troubleshooting
What would any project be without some unexpected problems? A couple of the ones I ran into sought to bring down the entire tank. Heat was a major issue for my AIO—it seems the manufacturers know you will need to invest in a chiller, but installing the hoses isn’t necessarily intuitive. The heat from built-in lights was far too much to combat.
Before investing in a tiny yet expensive chiller, I investigated many methods to cool down, first trying several cooling fans, which couldn’t bring the temperature close to ambient while my lights were in action. Next, an air pump situated in a cooler filled with ice packs. Not only would I not recommend this because of the danger of electrical shock, but cold air pumping through the system did absolutely nothing. And the bubbles caused a ridiculous amount of salt creep.
Perhaps the manufacturers can effect easier installation of chillers, as I consider them an absolute necessity in a reef tank this small. Chiller models that work off of electricity alone (no refrigerant) may also work, but the ones I looked at require that a hole be drilled into the wall of the tank (or an external filter). A preinstalled thermo-electric chiller might do wonders for the blood pressure of many nano hobbyists.
While testing solutions for my heat concern took immediate priority, hair algae sprouted all over my nano, literally overnight! When the tank only contained live rock and sand, it was very easy to do a 60-percent water change, clean the rock, and throw in some phosphate remover. By completely eliminating the photoperiod for several days, I kissed that hair algae goodbye. This would not have been easy had my tank already housed corals.
Where Nanos Are Headed
Historically, as was the case in the marine hobby with mini reefs, technology adapted to the practicality of sustaining reef organisms for long periods of time, and this is already becoming a reality with nano reefs. The all-in-one system is prime evidence for this notion, and I plan on keeping my nano reef for as long as I can plausibly sustain it.
With a little research, and some knowledgeable experience, the art of keeping a nano reef will become much more widespread. While a nano is definitely not the best idea for beginning marine enthusiasts, they have the potential to become a more acceptable alternative to full-size mini reef tanks. The future of the marine hobby has been fast approaching, and the arrival of so many unconventional hobbyists speaks for the popularity and success of the nano-reef-keeping hobby.
Acknowledgements
I would like to extend my thanks to Jeff Kurtz, James Fatherree, David Boruchowitz, Stan at Tropiquarium, and the members of the forum at reefcentral.com for their helpful advice and opinions, as well as their restraint from complete negativity with this project. It would not have been a success without all your help.
See the full article on TFH Digital http://www.tfhdigital.com/tfh/200711/#pg112