.png?h=595&iar=0&w=2781&hash=5FD5E69473BCC22199FBFA2FB71B6033)
A Guide to Fragging, Part 1: Zoanthids
Author: Richard Aspinall
Frag swaps and frag sales have become common events in recent years, and it’s hard to imagine what life was like before we could easily exchange and buy coral specimens. Frag swaps and sales are a key part of the hobby, not only for those wishing to build a collection of corals but also for many aquarists who support their hobby through sales of corals propagated at home.
We are still within a period in which we are learning a huge amount about the captive care of corals. Although the hobby is past its infancy, we are still in a phase of exploration and a great deal is being learned and remains to be discovered through the captive care of corals. Indeed the knowledge gained by hobbyists and the techniques used in home and public aquaria are being replicated in projects that are repopulating wild areas that have lost corals through environmental or other damage.
Wild or Captive
The hobby is still reliant on taking marine organisms from the wild. As time passes, this situation could well change significantly; it may become increasingly harder to source marine organisms as legislation designed to protect species in the wild impacts the hobby. It is also likely that, as the continued degradation of coral reefs shows no sign of being halted, at some point the availability of wild-caught specimens will dwindle. In order to avoid that terrible state of affairs, hobbyists should act as champions for marine conservation to ensure that reefs are protected for their intrinsic value as well as for sustainable harvesting.
Fragging offers a way in which a hobbyist can stock their aquariums with a wide range of corals that have never, beyond the original specimen, had any connection with the wild. There are numerous accounts of corals that have been passed as frags from one hobbyist to another over the years. It would be truly fascinating to trace the spread of a coral through the hobby as it goes from one tank to another.
Zoantharia
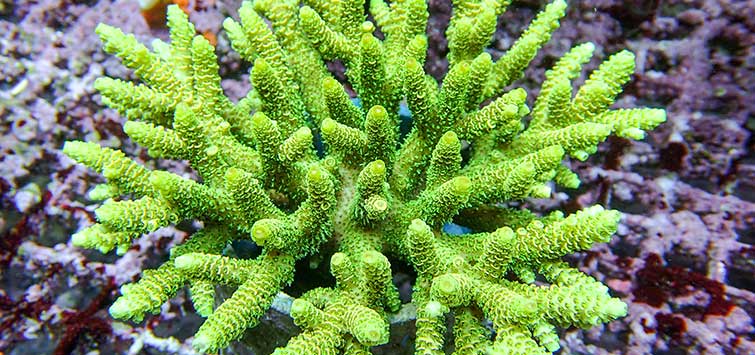
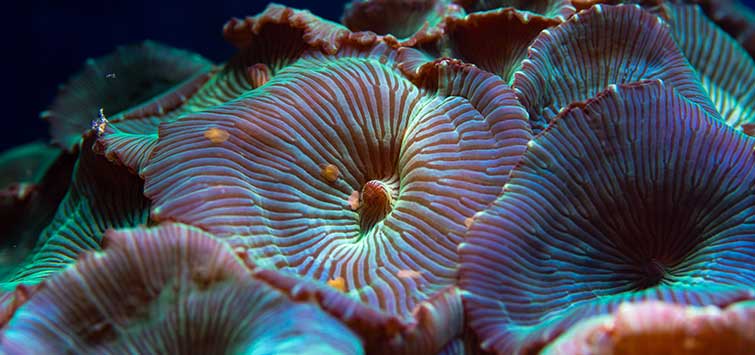
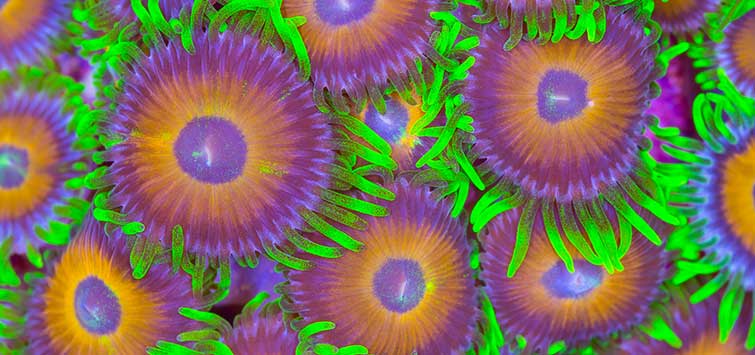
Zoantharia is the name of an order of cnidarians often found populating coral reefs, ranging down into the deep sea and other marine environments. Zoanthids are found in a wide array of colonizing formations that grow from a fleshy mat, or stolon, created along pieces of sediment, live rock, or other suitable substrate. The term zoanthid refers to all animals within the order Zoantharia.
Zoanthids, zoas, button polyps, whatever you call them—are ideal for fragging and captive propagation, and in this article I’ll show you how to do it.
Zoanthids are a mainstay in the hobby. Some people have a few colonies in their tanks, and novices are often encouraged to buy them as good “starter” corals; other people develop a deep and abiding passion for zoas and build collections that include fantastically colored and often rare specimens that can command a very high price on the market. The simple fact is, though, that most varieties, or morphs as they are sometimes known, are indeed ideal for the beginner and are very easily grown, propagated, and passed along to other hobbyists.
For example, I have a large colony of mint-choc chip zoanthids that are quite dull during “daylight,” but I’ve had them for around a decade and they’re part of the furniture. However it’s a little like the chap who has had the “same” axe for years but has replaced the head twice and the shaft more than once. The colony I now have is not the same as I started with. I can think of at least three large pieces of rock covered with sister polyps that have gone to other tanks and dealers. In fact the piece I have now could be several steps away from the original colony, which no doubt was itself many steps away from a wild specimen. Although the colony is dull during daylight it looks fantastic during the blue-shifted light produced by my LED lighting just after sunset—another great feature of zoas.
Are Zoanthids Toxic?
There is still a good deal of debate on this matter. Many animals in the order Zoantharia (which includes the family Zoanthidae that we’re referring to here), contain a powerful toxin known as palytoxin. However, there doesn’t seem to be much in the way of agreement as to just how much of this admittedly dangerous substance is contained within the various genera and species. As far as I can tell, the main risk to health is in eating the zoanthids and their slime or allowing a zoanthid’s tissue and slime to come into contact with an open wound—an easily avoided hazard!
I would suggest that you adopt the cautionary principle. Don’t eat them or their slime and don’t allow your pets or children to do likewise. Don’t allow contact with your fingers and eyes, nose, or mouth without washing your hands first, and don’t handle or work with zoas if you have damaged skin or open cuts or sores. Perhaps to be doubly safe you should use latex gloves. If you are very concerned, use eye protection or a breathing mask. Cutting zoas creates a pressure in their tissue that can cause fluids and tissue to be ejected. You want to avoid getting this in your face. I tend to work on zoas by keeping them in a shallow water bath, which reduces this risk significantly.
Zoanthid Nomenclature
For most of us the term “zoa” is quite sufficient and also quite useful, as it can take an expert to identify the actual species. My interest in zoanthids is not in their taxonomy but more in their massive diversity in terms of color and patterns.
Within this void of scientific nomenclature a whole series of unofficial names has been coined by hobbyists, collectors, and salespeople across the world, with names such as dragon eyes, bam bams, purple people eaters, gorilla nipples, fire and ice, mint-choc chip, black cherry novas (really should be novae, but never mind), blue hornets, and many, many more. I’ve even seen importers post pictures of interesting morphs and asking for name suggestions that presumably then enter the zoanthid collecting community’s common language.
It’s also worth noting that new and interesting morphs that appear on the market can attract eye-watering prices, regularly over a hundred dollars per head.
Zoanthid Biology
Zoanthids form encrusting mats that occur across various reef zones. They are fast-growing and rely mainly on their zooxanthellae for nutrition, but some specimens have shown feeding responses to certain particulate foods. However, targeted feeding of zoanthids is not considered necessary in standard home aquaria; they will rely on absorbing nutrition from the water and perhaps capture of bacterial aggregates and other passing material.
Zoanthids spread across suitable substrate using outgrowths from their mat-like coenenchyme called stolons. This means that different varieties can spread together and form mixed colonies, though it is more usual to see single-variety colonies that have formed a tough coenenchyme that can be carefully separated from the parent rock. Having said that, I prefer to allow colonies to overgrow the rock they are attached to by isolating them on the aquarium substrate. In this method the colonies are attempting to spread across the sand but cannot attach themselves, and each colony forms a “skirt” of unattached coenenchyme that can be easily removed, separated, and fragged.
Equipment for Zoanthid Fragging
Fragging zoanthids is very straightforward, but you will need some basic equipment. While you can buy some really excellent fragging kits, the individual components can be easily sourced. To start with you will need a good knife or scalpel with a sharp (ideally new) blade. I often find surgical scissors and a pair of tweezers also are useful. Wooden skewers can be useful to push the frag into position and hold it down.
I use a shallow dish filled with aquarium water as my holding tank, but I will occasionally work on specimens above the water, so I use a small chopping block that is then never used for food preparation.
Securing Frags
Some people use monofilament fishing line to secure frags to frag plugs or pieces of rock, and this works very well for larger colonies. Smaller colonies are best attached using cyanoacrylate glue or gel. Cyanoacrylate glue, generally called instant or “crazy” glue, was developed as a wound sealer and glues tissue exceptionally well, be it open wounds, zoa tissue, or your fingers—so take care. Specialist coral glues are available; many are excellent, though I have found that normal hobby glues are often sufficient and more readily available.
Frags need to be attached to something. You can use chunks of live rock, and if you are planning to make a feature colony, several frags can be attached to a suitable piece. However, if you are wishing to raise multiple frags for swap or sale, then commercially available frag plugs are ideal. These mushroom-shaped pieces of ceramic or plastic can be held in your tank or sump or in a frag rack in a dedicated tank.
I’ve tried several methods and really like the type of frag plug that has a stem that can be easily snapped off to make it easier to then attach the disc to my rockwork using a two-part epoxy. I have also used some species of small shells such as clams and cockles; they have a more natural appearance and are of course free if you live near the ocean.
Fragging Step by Step
1. Select your source zoanthid and set up your workstation. Collect your equipment and make sure you have everything at hand in a well-lit work space. I usually use the dining table and ensure Mrs. Aspinall is out of the house beforehand—and I clean up thoroughly.
“Mother” colonies can be peeled (a scalpel may help), though this isn’t always easy and can be very messy; as I suggested previously, it’s often easier to wait for them to overgrow. Either way, what you want to start with is a piece of the mat with a handful of polyps attached. The number of polyp heads you decide upon will be related to the size of your source colony. However, six to ten makes a good starting number to get to grips with. You can cut the rock apart that the mother colony resides upon, but this can be messy. If you do try this, make sure you use a mask, as a lot of tissue and slime will be liberated into the air around you.
After separating daughter material from the mother colony I like to let the “mother” rest in fresh aquarium water for a while before returning it to my aquarium. I also make sure my activated carbon has been replaced recently to help deal with any “stress” chemicals produced by the zoanthids. Remember, the zoanthid is responding to attack and liberating chemicals that are designed to discourage predation.
2. Select your frag plugs or suitable pieces of live rock, coral, or shell and lay them out along with your zoanthid pieces to ensure everything will fit nicely. The more quickly the frags are attached the more quickly they will show growth and can be swapped or placed into your display aquarium.
If you are quite dextrous you can try the fishing line method and literally tie the zoanthid mat to the rock or frag plug. This can be very effective and secure, but if you’ve got clumsy hands like me you might be better off using the cyanoacrylate method.
While cyanoacrylate will set under water and easily glue damp specimens, I like to dry the subjects a little with kitchen paper and then apply the glue liberally to the underside of the zoanthid and the frag plug/rock. Some glues set more quickly than others; the rate depends upon a chemical reaction and not drying out—hence it can be very rapid. I use tweezers and the scalpel to push the frag onto the plug/rock until the glue sets. Avoid using your fingers, as you wouldn’t want to glue the polyps to yourself. If you need to, add more glue to ensure that the frags are going to hold, and return to the water bath.
3. The zoas are likely to release a fair amount of slime in this process, so place the frags into fresh aquarium water for a while before placing them into your aquarium.
You can put the frags into your display aquarium straight away, but it’s better to use a frag rack so that you can more easily monitor them or reattach them if the glue or line fails. I also prefer to place them in areas with mild current in order to stop them from moving against the plug/rock; I also reduce the lighting a little to help limit stress.
After completion, be careful to wash your hands and all your equipment thoroughly. You will need to properly dispose of any left-over water and of course your disposable gloves and mask if you’ve worn one. Taking time to ensure that no potentially toxic equipment is left around your home is a sensible precaution.
If you do suffer any adverse symptoms, get yourself checked out and make sure medics are informed of what you’ve been doing. However, you should be fine as long as you take basic and simple precautions.
4. Within a few days the zoas will settle down and polyps will open, the coenenchyme will begin to form itself to the plug/rock, and within a few more days the new colony will be attached and beginning to send out new stolons.
After a few weeks your new frag is ready for swapping or addition to your display aquarium. If you have used the line method you can remove the line or simply snip away any exposed line. Some may have become incorporated into the zoanthid’s coenenchyme; while contained it is of no problem.
The new frag’s growth rate will depend upon several factors such as available nutrition and lighting. While in normal situations zoas don’t tend to be fed by most hobbyists, you might want to consider offering small particulate foods such as oyster eggs. This may or may not elicit a feeding response, but if it does it is likely to increase growth rates. Remember, though, that not all zoanthids respond to the same stimuli. I have one morph that regularly takes small frozen copepods, whereas colonies adjacent to it show no feeding response at all.
5. A note of caution here. Zoanthids can spread rapidly over your aquarium’s rockwork and can overcrowd other cnidarians. I prefer to keep them isolated on pieces of rock amidst a “sea” of coral sand. If you do place your zoas onto the rockwork, be prepared for their rapid growth.
That wraps up how to frag zoanthids. Next time I’ll examine fragging mushroom polyps.
[Note: Some hobbyists use a wet saw when cutting pieces of rock encrusted with zoanthids. During this process, it’s believed that chemicals containing palytoxin can become airborne and easily inhaled into the lungs. Aquarists have reported severe bacterial infections and reactions from the inhalation of palytoxin, and in severe cases this could potentially be fatal. It is vital, when cutting zoanthids in this manner, to use a high-quality respirator that protects from this danger —Eds.]